A Discussion on the Pattern Making Process for a Selected Dress
Why a Discussion on Pattern Making Process?
As we need patterns to form a final dress, we worked on making patterns according to our inspiration and selected dress style. The inspiration of the dress was ‘Breath of fresh air’- a post pandemic liberating expression when the world came out from their confined zones to take the breath of fresh air. As we have already discussed the season, customer profile, theme board, mood board and all the necessary information in our portfolio, we are just covering the process report of pattern.
Contents
- Introduction
- Some background of the work
- A list of pattern pieces
- Tops
- Front bodice (right and left)
- Back bodice (cut on fold)
- Sleeve
- Bottom Portion
- Front skirt (layer 1 and 2)
- Front skirt (layer 3)
- Basic skirt (back)
- Production pattern
- Sewing details
- Conclusion
Some background of the work:
Theme name: Breath of fresh air
Season: Spring/ Summer 2022 Dress category: Casual Streetwear Customer profile:
Gender: Female
Age: 18-25
Country: United States of America (USA)
Region: New York City
Educatonal status: A-leve to undergrad student
Occupaton: Student
Monthly expense: $2000
Hobby: Travelling, reading
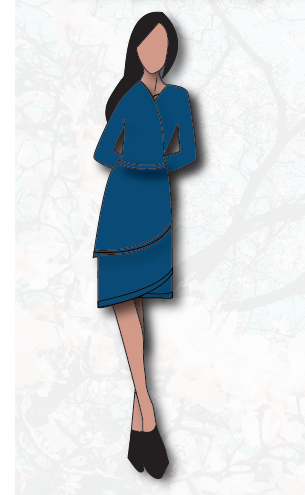
Figure 1 Final dress sketch. Photo courtesy: Kazi Purba.
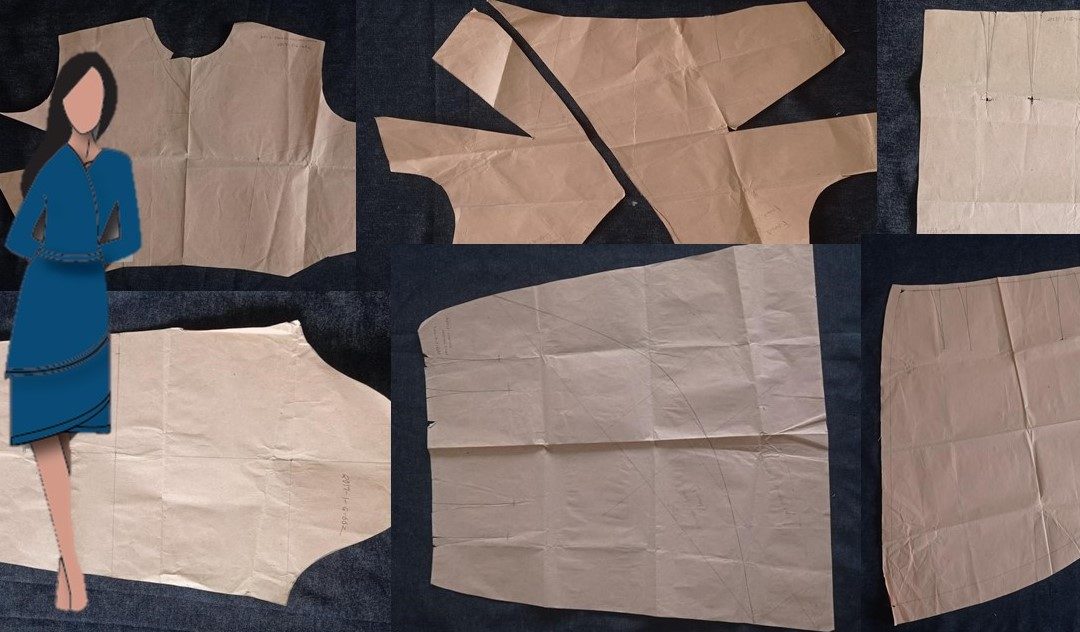
A list of pattern pieces:
- Front bodice (right)
- Front bodice (left)
- Back bodice (cut on fold)
- Sleeve (1*2= 2)
- Skirt (Front) Layer 1, Layer 2.
- Skirt (Front) Layer 3
- Skirt (Back) Layer 4
Size of the pattern: All the patterns are made using the measurement of the size 10 dummy.
Tops:
We have mainly done the patterns in two stages- 1. Basic block and 2. Production Pattern (by adding allowance to the basic block)
1. Basic Block
Front bodice (right and left)
The front bodice is mainly done using the basic bodice and a touch of dart manipulation.
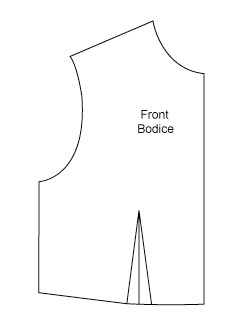 Figure 1: Basic bodice (front). Photo courtesy: Kazi Purba
As our top is asymmetrical, we couldn’t just make the two parts of the front bodice same by cut and fold. That is why, we had to take the basic bodice, then cut and fold and then we had to perform dart manipulation.
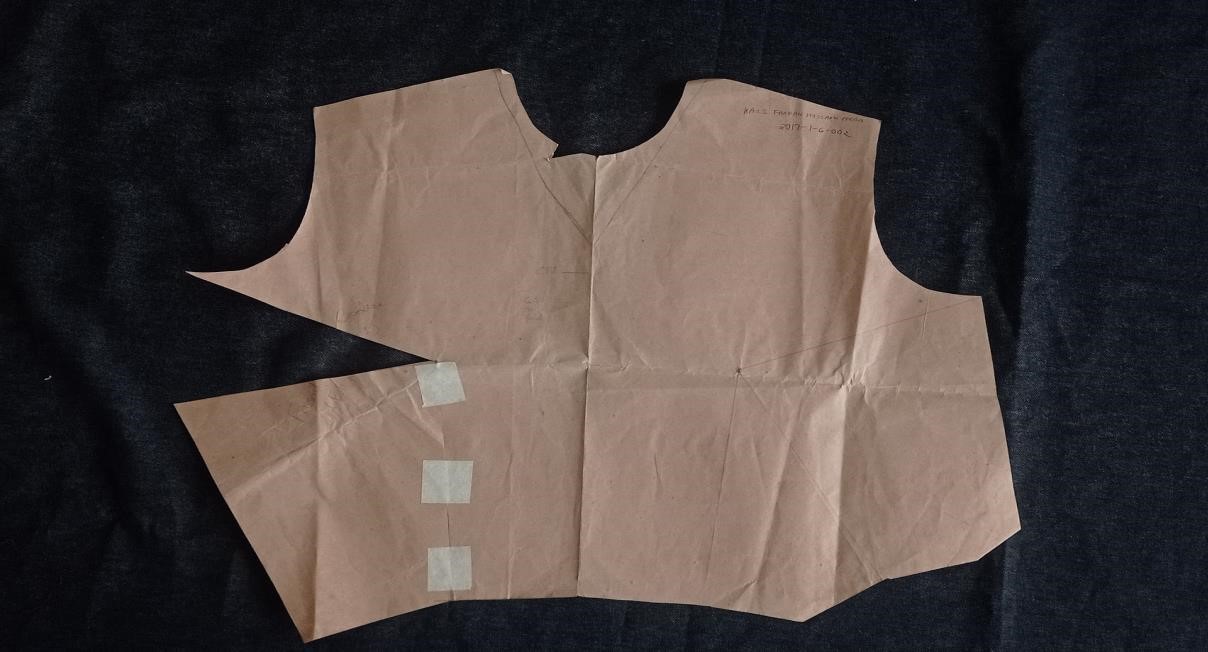 Figure 2: The full part pattern with dart manipulation. Photo courtesy: Kazi Purba
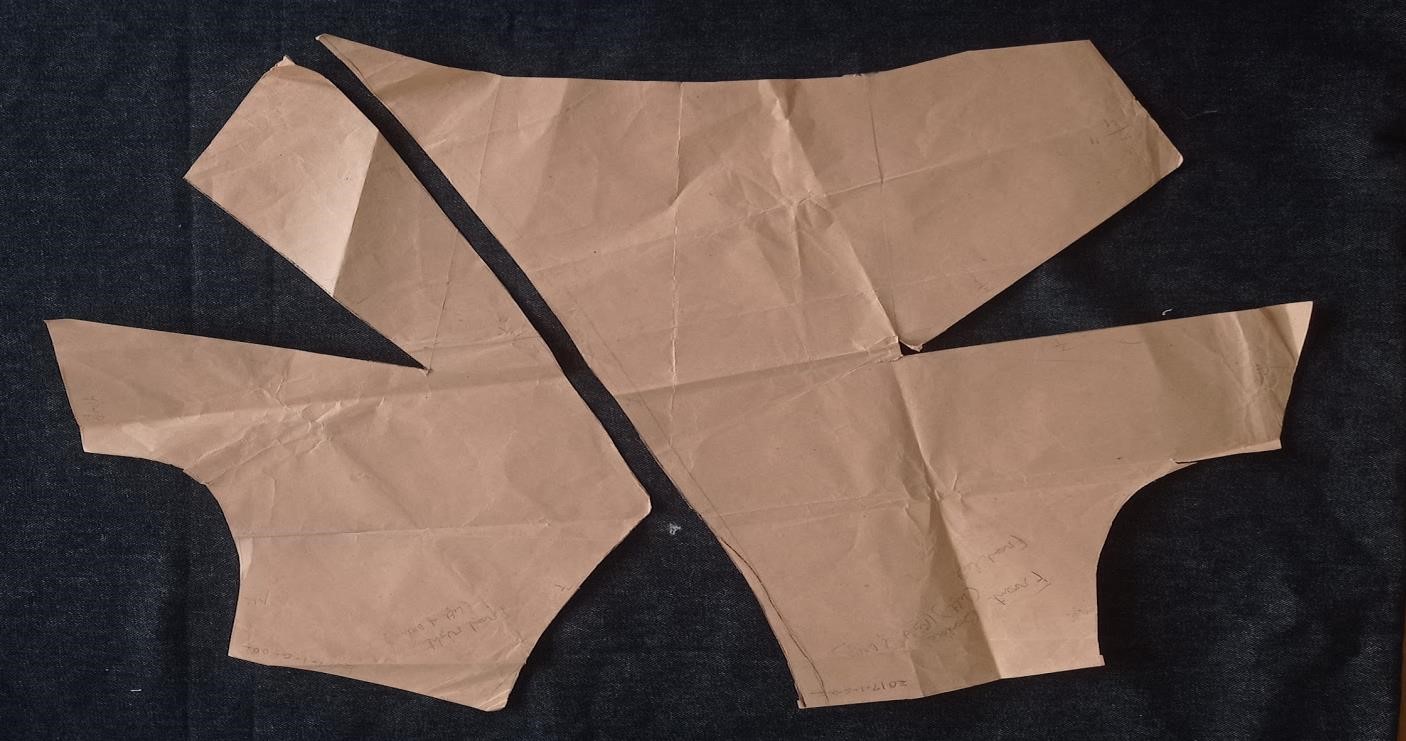 Figure 3: Two parts (right and left) of the front bodice with darts. Photo courtesy: Kazi Purba
Back bodice (cut on fold)
For our dress, we kept the basic back bodice. The basic back bodice was made with the size 10 dummy measurement. This is done by cut and fold.

Figure 4: Basic bodice.(back). Photo courtesy: Kazi Purba.
Sleeve
The sleeve is made according to the basic sleeve.
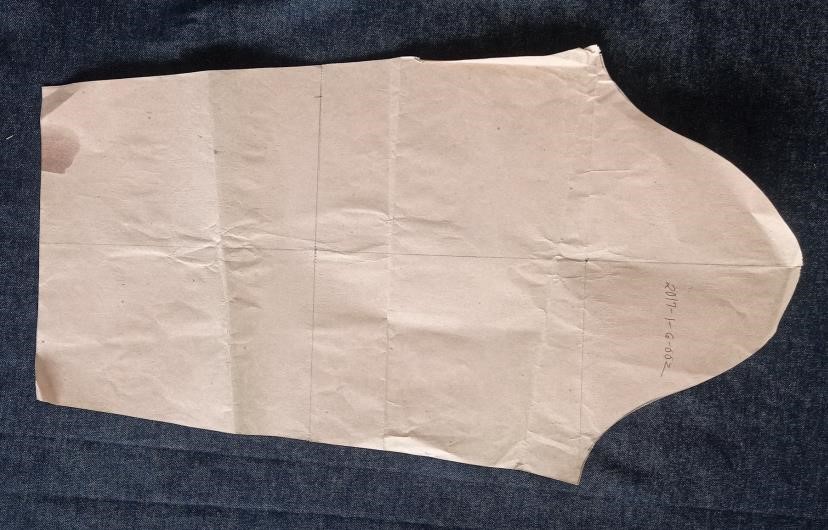
Figure 5: Sleeve. Photo courtesy: Kazi Purba
Bottom Portion
Front skirt (layer 1 and 2)
According to our design, we have developed the pattern into three layers for the front skirt.
The basic front skirt is firstly cut on fold and then it is customized according to the design of the dress using vary from curve ruler. Two patterns are made in this way. The layer 1 and 2. The layer 2 is 3 ich longer than the layer 1
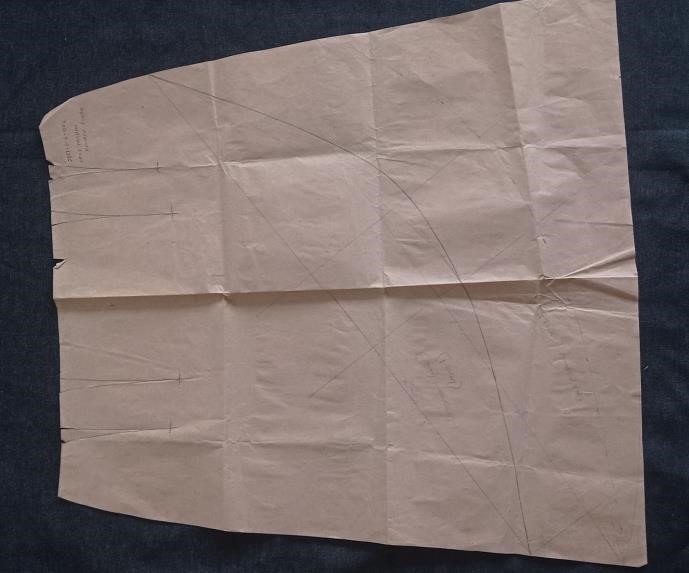 Figure 6: Layer 1, 2 and 3 of front skirt. Photo courtesy: Kazi Purba
The front skirt is made by using the basic front skirt.
Front skirt (layer 3)
The layer 3 is made by using the flipped version of the layer 2.
Basic skirt (back)
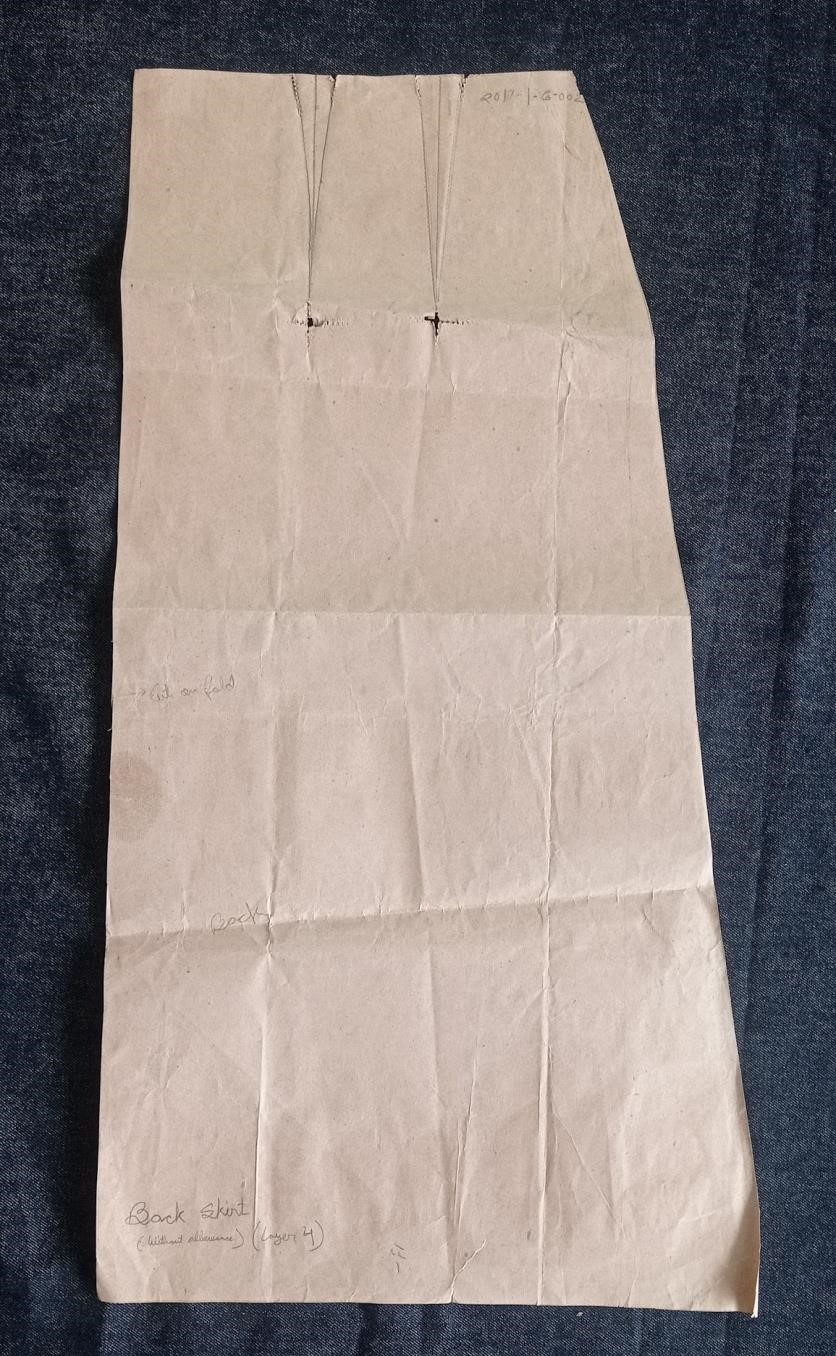
Figure 7: Basic skirt. (back). Photo courtesy: Kazi Purba.
The back of the bottom part of the dress is developed using the basic skirt. It is used for cut and fold.
Production pattern:
Patterns are traced and made again using seam allowance.
Tops
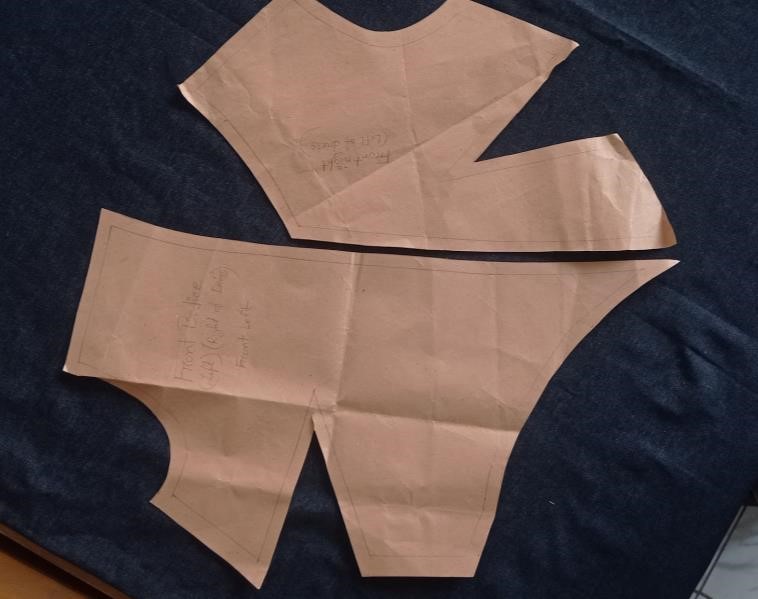
Figure 8: Two parts (right and left) of the front bodice with darts(Production pattern). Photo courtesy: Kazi Purba.
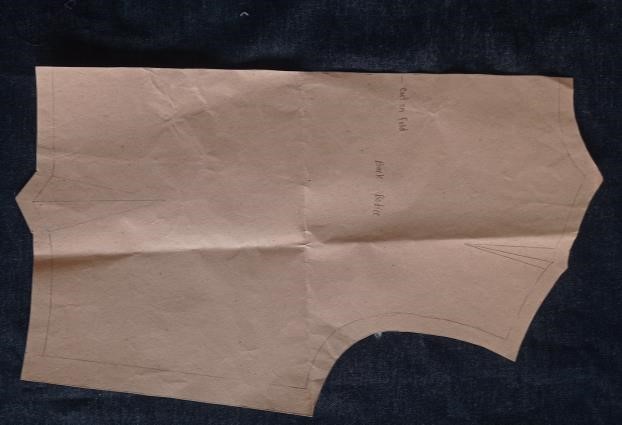
Figure 9: : Basic bodice.(back) Production Pattern. Photo courtesy: Kazi Purba.
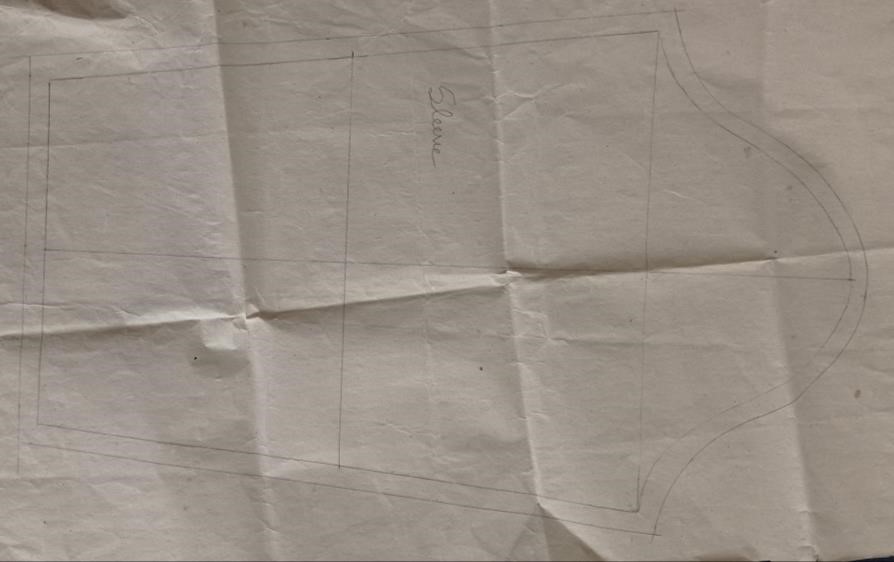 Figure 10: Sleeve (Production pattern) Photo courtesy: Kazi Purba
Bottom portion
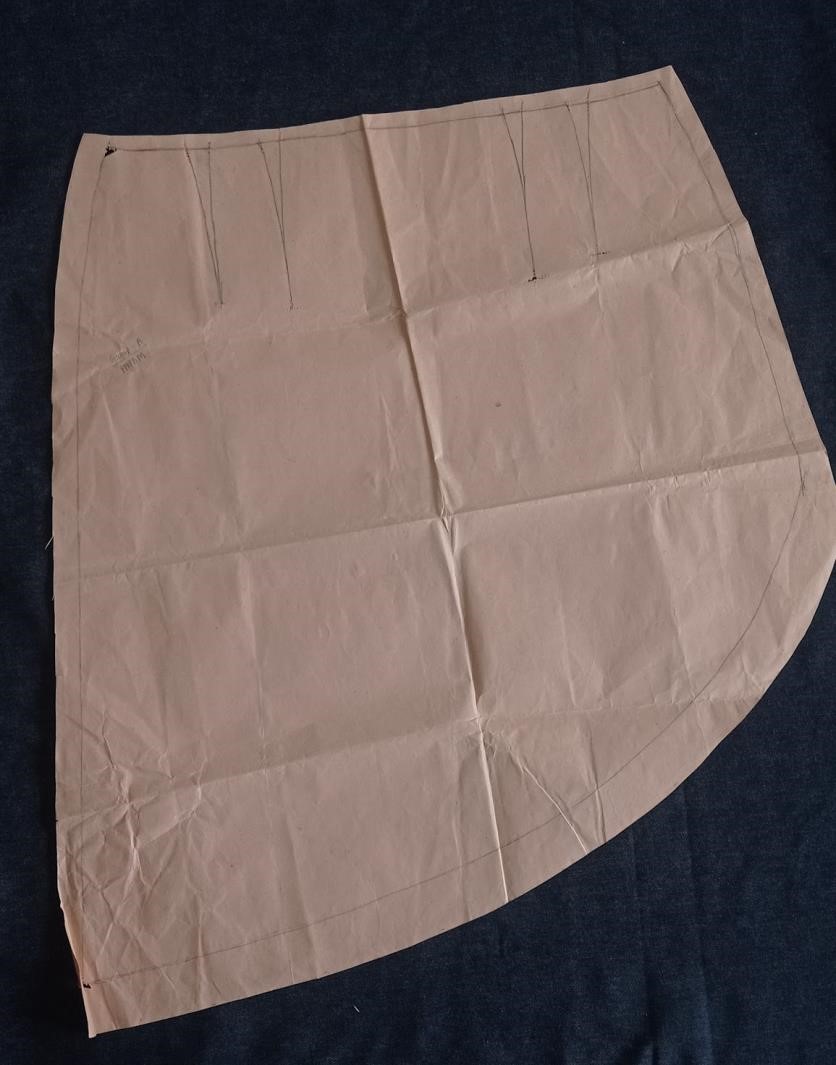
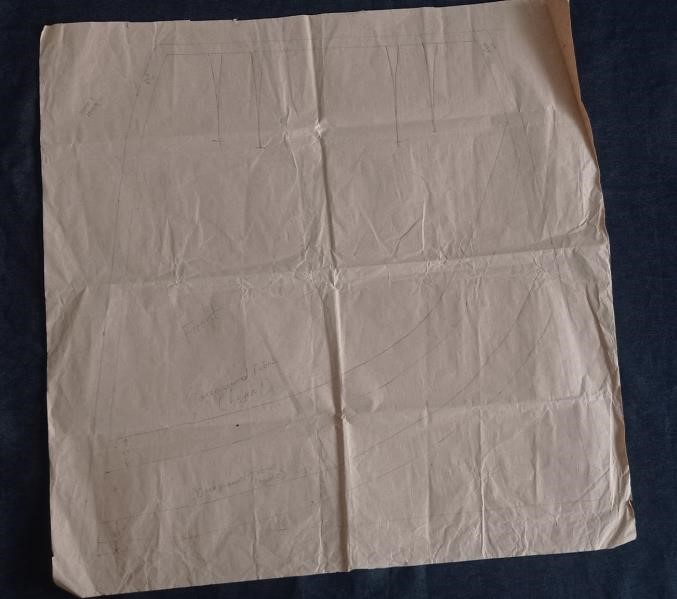
Figure 11: Layer 1 and 2 of Front skirt (Production pattern). Photo courtesy: Kazi Purba
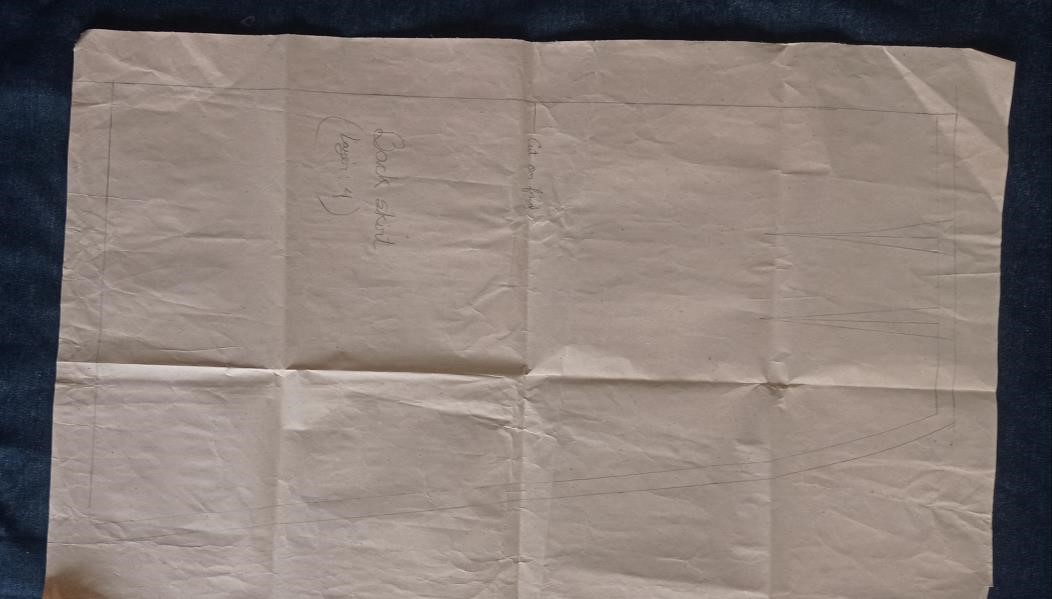 Figure 12: Basic skirt. (back) Production pattern. Photo courtesy: Kazi Purba
Sewing details:
Side seam is done by chain stitch using Overlock machine.
And the others are done by Plain stitch using Single needle lock stitch machine.
Conclusion:
The patterns were made with reference to the basic blocks we created in our early pattern courses.They were traced and then customized accordingly. The basic patterns that we learnt to make, gave us a great opportunity to understand more complex patterns and thus we implemented them to make patterns for our designed dress. The previous actions (eg. Theme board, mood board, etc.) and further actions were taken accordingly to make the dress which we have covered in the portfolio.
The report was written by: Kazi Purba, the Founder and President of Fashionnovation, for his final year Portfolio project in Department of Textile Fashion and Design, Bangladesh University of Textiles (BUTEX).
For any query or if you want to publish your articles in our website, please email: fashionnovationfd@gmail.com
As you’re interested in pattern making process, you’ll also be interested in fashion draping.
You can also read all of our fashion trend related articles here:
Fashion in the 21st century for learning about the overall fashion trends of this century
Fashion trends of 2019, 2021, 2022 and 2023 you’ll also get to know some basics of fashion trends.